Making wine at home is easier than most people think. You do not need fancy equipment or a degree in food science. You need fruit, sugar, yeast, water, and a clean bucket. That is it. This guide walks you through the whole process in plain language, from picking your first recipe to bottling your first batch.
Most beginners start with country wines made from fruit juice or frozen concentrate. These are forgiving, cheap, and ready to drink in about four to six weeks. Grape wine takes longer and costs more, so save it for later.
This article covers three beginner-friendly recipes, the exact steps to follow, and the mistakes that ruin most first batches. By the end, you will know enough to start your own batch this homemade wine recipes for beginners.
What You Actually Need To Start?
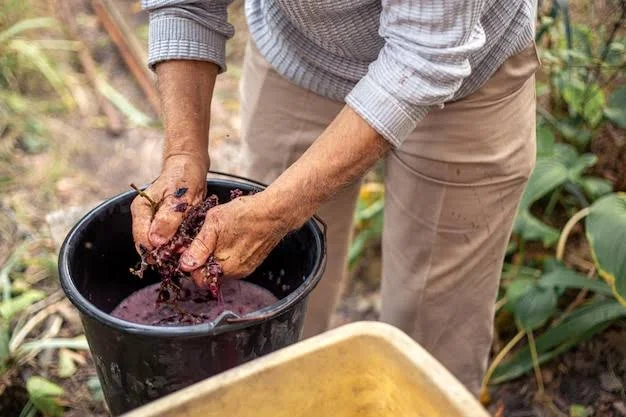
You do not need a full winemaking kit. You need a few basic items, most of which you probably already own.
A food-grade bucket or large pot. A 2-gallon (8-liter) plastic bucket works well for a 1-gallon batch. Make sure it is food-grade. Do not use a trash can or a bucket that held chemicals.
A long spoon or paddle. Plastic or wood works. You will use it to stir the must, which is the juice mixture before it becomes wine.
A clean cloth or towel. You will cover the bucket during the first few days. This keeps dust and insects out while letting air in.
Bottles. You can use swing-top bottles, empty wine bottles with new corks, or even plastic soda bottles with screw caps. Clean them well.
An airlock and rubber stopper (optional but helpful). An airlock lets gas escape without letting air in. You can skip it for your first batch by covering the bucket with a cloth, but an airlock makes the process safer and less messy.
A hydrometer (optional). This tool measures sugar levels. It helps you know when fermentation is done and how strong your wine will be. You can make wine without one, but it is the single most useful cheap tool you can buy.
That is the full list. No stainless steel tanks, no filters, no pH meters. Keep it simple for your first few batches.
Read Also: Homemade Raspberry Wine Recipe
The Three Recipes Beginners Should Start With
These recipes make one gallon (about 3.8 liters) of wine. One gallon gives you about five standard bottles. The process is the same for all three. Pick the one that sounds best to you.
Recipe 1: Apple juice wine (the easiest start)
This recipe uses store-bought apple juice. No chopping, no crushing, no mess. It is the fastest way to learn the process.
What you need:
-
1 gallon (3.8 liters) apple juice with no preservatives (check the label for potassium sorbate or sodium benzoate)
-
2 cups white sugar
-
1 packet wine yeast (Champagne yeast or cider yeast works well)
-
1 teaspoon yeast nutrient (optional but recommended)
What to do:
-
Pour half the juice into your clean bucket.
-
Add the sugar and stir until it dissolves completely.
-
Pour in the rest of the juice.
-
Add the yeast nutrient and stir.
-
Sprinkle the yeast on top. Do not stir it in. Just let it sit.
-
Cover the bucket with a cloth and secure it with a rubber band.
That is the entire setup. It takes about ten minutes.
Recipe 2: Frozen grape juice wine (a step up in flavor)
This uses frozen grape juice concentrate. It tastes more like real wine than the apple version and costs only a little more.
What you need:
-
4 cans (12 ounces each) frozen grape juice concentrate, thawed
-
3 cups white sugar
-
1 gallon water
-
1 packet wine yeast
-
1 teaspoon yeast nutrient
What to do:
-
Pour the thawed concentrate into your bucket.
-
Add half the water and stir.
-
Add the sugar and stir until dissolved.
-
Add the rest of the water.
-
Add yeast nutrient and stir.
-
Sprinkle yeast on top. Do not stir.
-
Cover with a cloth.
Recipe 3: Country wine from frozen berries
This recipe uses frozen mixed berries. It takes slightly more work because you need to crush the fruit, but it produces a wine with real body and flavor.
What you need:
- 2 pounds (about 900 grams) frozen mixed berries, homemade wine recipes for beginners
- 2 pounds (about 900 grams) white sugar
- 1 gallon water
- 1 packet wine yeast
- 1 teaspoon yeast nutrient
- 1 teaspoon pectic enzyme (helps break down fruit and clear the wine)
What to do:
-
Put the thawed berries in your bucket and crush them with a clean potato masher or your hands.
-
Boil half the water and pour it over the crushed fruit.
-
Add the sugar and stir until it dissolves.
-
Add the rest of the water (cool water is fine).
-
Add yeast nutrient and pectic enzyme. Stir well.
-
Let the mixture cool to room temperature.
-
Sprinkle yeast on top. Do not stir.
-
Cover with a cloth.
The fermentation process, day by day
This is where most beginners get nervous. They should not. Fermentation is simple. Yeast eats sugar and turns it into alcohol and carbon dioxide. Your job is to keep the environment clean and let the yeast do its work.
Days 1 to 3: The vigorous start
Within 24 to 48 hours, you will see bubbles on the surface. You will hear a faint hissing sound. The mixture will smell like bread or beer. This is normal.
Stir the must twice a day with your clean spoon. This pushes the yeast back into the liquid and releases trapped gas. For the berry recipe, stirring also keeps the fruit cap from drying out and growing mold.
Keep the bucket covered with the cloth between stirrings.
Days 4 to 7: The slowing down
The bubbles become less violent. The smell becomes more wine-like and less bready. This is when you move the liquid off the fruit and into a narrower container.
For the apple and grape juice recipes, there is no fruit to remove. You can skip straight to the next step.
For the berry recipe, strain the liquid through a clean cloth or fine mesh bag into a clean jug or carboy. Squeeze the cloth gently to get the remaining liquid. Discard the fruit solids.
Week 2 to Week 4: The quiet finish
Fit your jug with an airlock and rubber stopper. If you do not have an airlock, cover the jug opening with a cloth and secure it tightly.
The wine will continue to ferment slowly. You will see occasional bubbles in the airlock or tiny bubbles rising in the liquid. The wine will start to clear. Sediment will collect at the bottom.
Leave it alone. Do not stir. Do not shake. Do not open it to smell it every day. Every time you open it, you let oxygen in, and oxygen turns wine into vinegar.
You May Also Like: Homemade Flavored Wine Recipes
How To Know When Fermentation Is Finished?
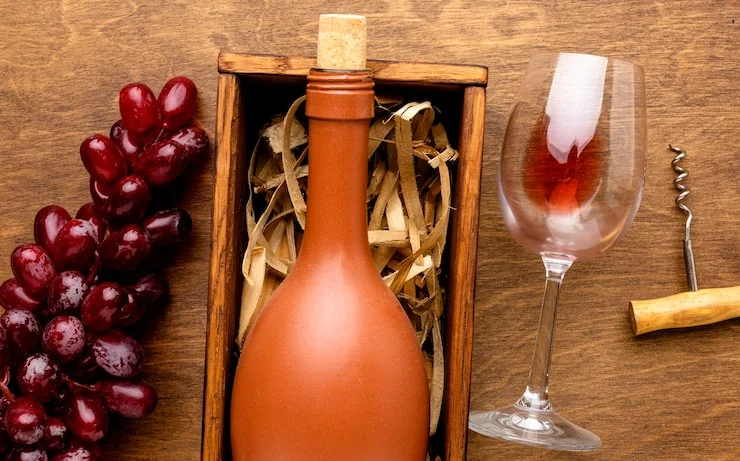
This is the part where a hydrometer earns its small cost. A hydrometer measures the density of the liquid. Sugar water is dense. Alcohol water is less dense.
Take a reading before you add yeast. Write it down. Take another reading after two weeks. If the reading is the same two days in a row, fermentation is done.
If you do not have a hydrometer, look for these signs:
- No bubbles in the airlock for three full days
- The wine has cleared and you can see through it
- The sediment has settled and stays settled when you do not move the jug
- The wine tastes dry, not sweet
If all four are true, your wine is ready to bottle.
Bottling without fancy equipment
You do not need a bottling wand or a floor corker. You need clean bottles, a clean siphon (a length of food-grade tubing works), and clean caps or corks.
Step 1: Clean everything. Wash your bottles with hot water and a tiny amount of unscented dish soap. Rinse thoroughly. You can also use a no-rinse sanitizer if you have one. Clean bottles are the difference between wine that lasts months and wine that spoils in a week.
Step 2: Siphon carefully. Place your jug of wine on a table. Put your clean bottles on the floor below it. Put one end of the tubing in the wine, about halfway down. Do not let it touch the sediment at the bottom. Suck on the other end briefly to start the flow, then let it drain into the bottle. Stop when the bottle is full.
Step 3: Cap or cork. Swing-top bottles are the easiest for beginners. Just close the latch. If you are using corks, soak them in warm water for a few minutes first, then push them in firmly.
Step 4: Store upright for a week. This lets any remaining sediment settle. Then you can store the bottles on their sides if you are using corks, or upright if you are using swing-tops.
The Five Mistakes That Ruin Most First Batches
Most beginner wine failures come from the same handful of errors. Avoid these and you will succeed.
Mistake 1: Using juice with preservatives. Potassium sorbate and sodium benzoate are added to juice to stop fermentation. They will stop your yeast too. Read every label. The only ingredients should be fruit and maybe water or ascorbic acid (vitamin C).
Mistake 2: Not cleaning well enough. Wild bacteria and wild yeast live on everything. They can turn your wine sour or moldy. Wash your hands, your bucket, your spoon, and your bottles. Rinse well. Do not skip this.
Mistake 3: Letting air touch the wine after the first week. Oxygen is good during the first few days because yeast needs it to multiply. After that, oxygen ruins wine. Keep the container sealed with an airlock or a tight cloth. Do not stir after the first week.
Mistake 4: Bottling too early. If you bottle while fermentation is still happening, the bottles can explode. Wait until the hydrometer reading is stable or until you see no bubbles for three days. Patience protects your kitchen.
Mistake 5: Drinking it too soon. Young wine tastes sharp and harsh. It needs time to settle. Apple wine is drinkable at four weeks but much better at eight weeks. Berry wine improves a lot after two months in the bottle. Give it time.
Frequently Asked Questions
Can I Use Bread Yeast Instead Of Wine Yeast?
You can, but the results are unpredictable. Bread yeast is bred to make bread rise, not to make clean-tasting alcohol. It can produce off-flavors and leave a bready aftertaste. Wine yeast costs about a dollar per packet and makes a much better product. Use wine yeast.
Why Is My Wine Cloudy?
Cloudy wine is normal in the first few weeks. It usually clears on its own after another week or two of sitting. If it stays cloudy after two months, you can add a clearing agent (called finings) from a brew shop. For your first batch, do not worry about clarity. Taste matters more.
Can I Double The Recipe?
Yes. The process is the same. Just use a bigger bucket. Leave at least a third of the bucket empty so the foam has room to rise. A 5-gallon batch in a 6-gallon bucket works well.
How Strong Is This Wine?
The recipes here make wine around 10 to 12 percent alcohol. That is similar to a standard commercial wine. The exact strength depends on how much sugar the yeast converts, which a hydrometer will tell you.
What To Do After Your First Batch?
Once you have bottled your first gallon, you will know more than any article can teach you. You will know how your yeast behaved, how long your fermentation took, and whether you like the taste.
The best next step is to make the same recipe again. Change one thing. Use a different yeast. Add a cup of sugar. Try a different juice. Keep notes. Write down what you did and what happened.
Winemaking rewards people who pay attention and keep trying. Your first batch might be rough. Your third batch will be good. Your tenth batch will be something you are proud to share.